
Note: I’ve decided to stop numbering the war games because I’m often working on a couple at any given time and some research hiccups can slow down the work. So, to make sure they keep getting published, I’ll be doing them without regard for order.
Here’s a fun Quick Battle I’ve been wanting to do. Before he was the Governator of Cahleeforneeah, there was a time in the 80s and 90s when Arnold Schwarzenegger was an action star. Paired up with director James Cameron, they made some pretty awesome films like The Terminator (1984), Terminator 2: Judgment Day (1991), and True Lies (1994). In particular, True Lies contains a scene near the end of the film involving some U.S. Marine Corps AV-8B Harrier II attack planes.
Scenario Background
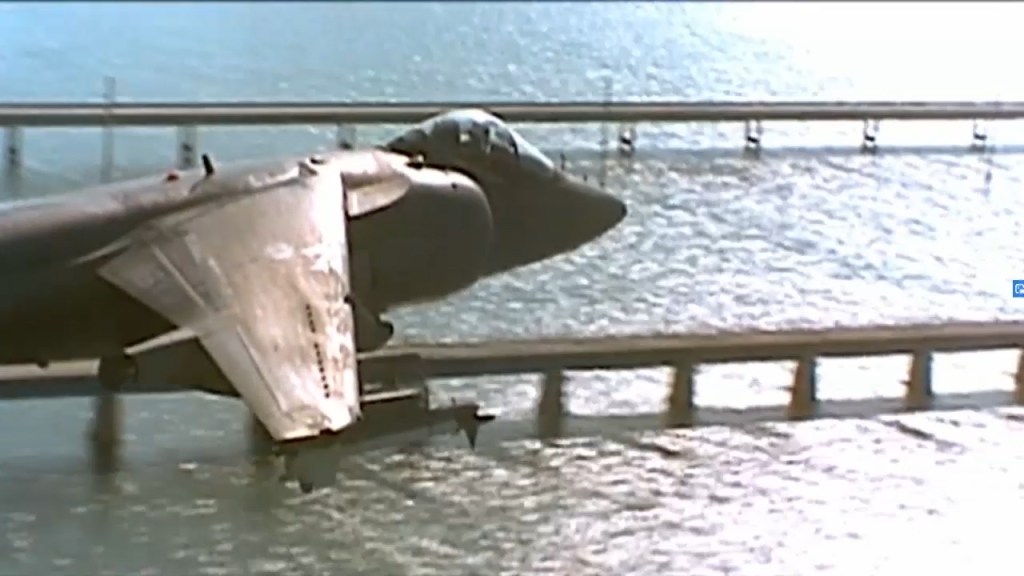
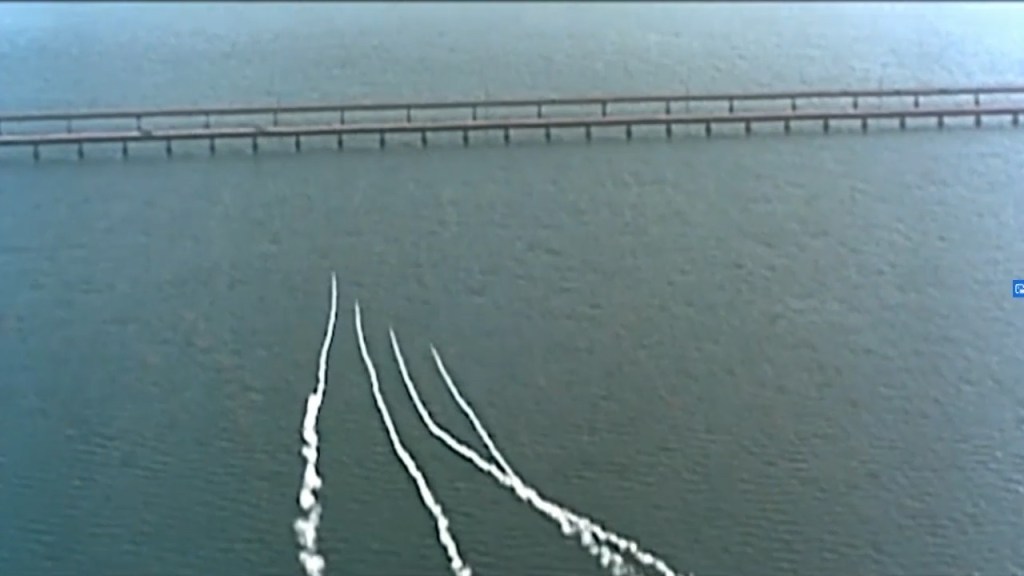
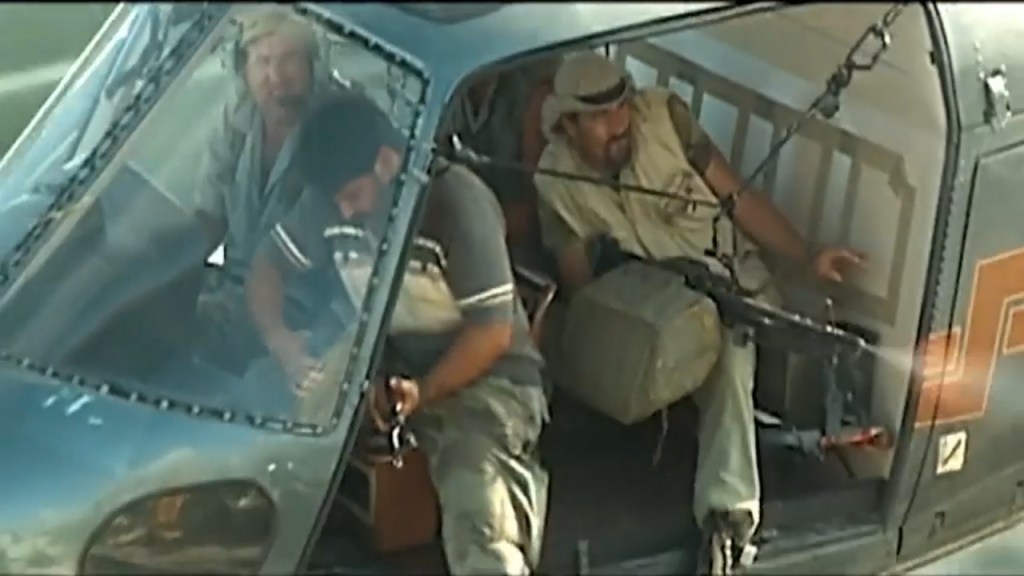
The setup is that Arnold Schwarzenegger’s super-secret agent character, Harry Tasker, is trying to stop some terrorist trucks carrying stolen nuclear weapons to the U.S. mainland across the Seven Mile Bridge in the Florida Keys. Earlier in the film, the super evil, ultra-extremist, terrorist faction, Crimson Jihad, had smuggled them into the U.S., concealed in statues. As Harry and his partner, Gib (Tom Arnold), pursue in helicopters, they radio for additional support. Luckily, they get the assistance of two U.S. Marine Corps AV-8B Harrier II planes from NAS Key West. Reportedly, the Marines supplied three planes and their pilots to the film production for $100,736 (~$2,410/hour) (IMDB.com, n.d., para. 9). If you look closely, you can see that these aircraft are from Marine Attack Squadron 223 (VMA-223) “Bulldogs”. While only two planes are shown, presumably the third was used for other shots or on standby in case something went wrong with a plane.
Since the scenario is simple, I wanted to see if I could recreate it in C:MO. Given that it’s based on a silly ’90s action film, this war game is not meant to be serious or realistic. It’s also not meant to be a one-for-one recreation of the scene from the film.
The Grim Reapers even did their own recreation of the scene using DCS.
Quick Battle – Parameters
- Starting Separation: ~18 nm.
- Adversary EMCON State: Sensors passive
- Local Time: Day (0730)
- Engagement takes place in: Caribbean Sea off the Florida Keys
- Weather: Clear, no clouds, no rain, wind/sea state 0, avg. temp. 25C.
| VMA-223 AV-8B Harrier II+ (USMC) [Player] | Crimson Jihad (Terrorists) [A.I.] |
|---|---|
| 2 Aircraft | 6 Ground Vehicles (4x truck, 2x Avenger SAM) |
| Type: Attack Aircraft Min Speed: 350 kts Max Speed: 570 kts Commissioned: 2001 Length: 14.5 m Wingspan: 9.3 m Height: 3.6 m Crew: 1 Empty Weight: 6340 kg Max Weight: 15980 kg Propulsion: 1x F402-RR-408/Pegasus 11-21 Mk.107 | (Avenger SAM section) Type: Mobile Vehicles Commissioned: 1991 Length: 0 m Width: 0 m Crew: 1 |
| Sensors: AN/AAR-51 – Infrared Infrared, Target Tracking and Identification FLIR Max Range: 148.2 km AN/APG-65(V)2 – (Harrier II+) Radar Radar, FCR, Air-to-Air & Air-to-Surface, Medium-Range Max Range: 111.1 km Generic LLTV – (2nd Gen, Weapon Director & Target Tracking And Identification) Visual LLTV, Weapon Director & Target Tracking and Identification Max Range: 148.2 km AN/ALR-67(V)2 – (2nd Gen, Weapon Director & Target Tracking And Identification) ESM RWR, Radar Warning Receiver Max Range: 222.2 km | Sensors: AN/VLR-1 ISU – Infrared Infrared, Target Search, Tracking and Identification Camera Max Range: 55.6 km |
The Film
Let’s start by reviewing the bridge attack scene in the film. I’ve taken screenshots and numbered them with explanations below.


- The Harriers arrive on scene.
- “Lime 0-1 has tally on three trucks eastbound on the bridge.” The flight leader (Lime 0-1) confirms visual on the targets.
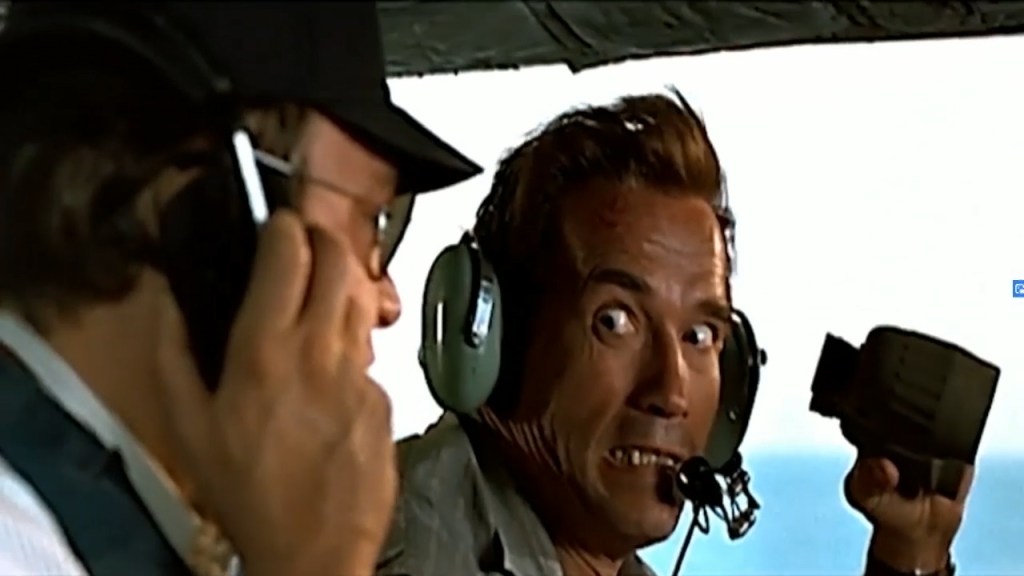
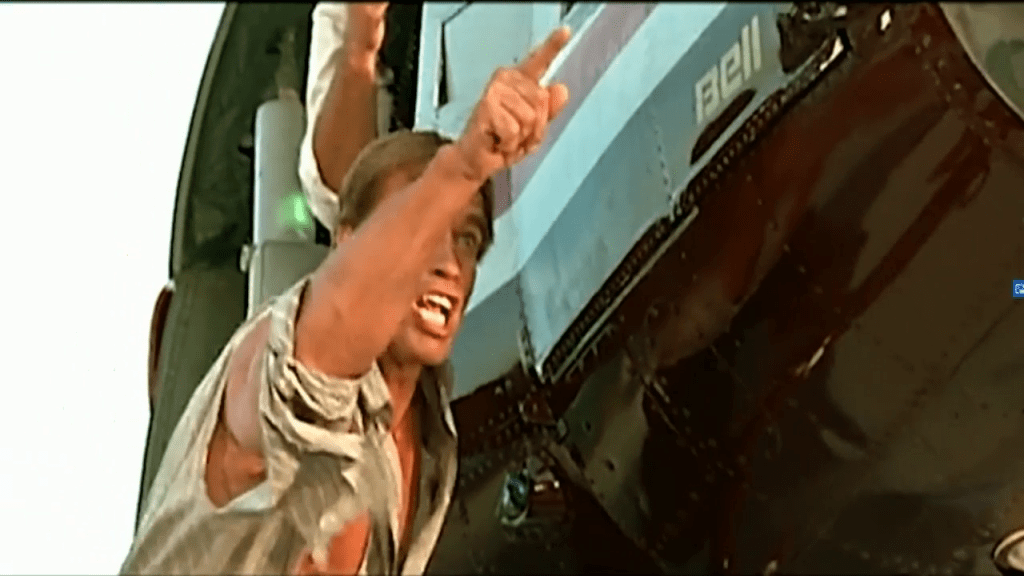
- “Rohgaar Lime 0-1, youahr cleahr to enghage!” Observing the action from a helicopter, Harry gives the Harriers clearance to open fire.
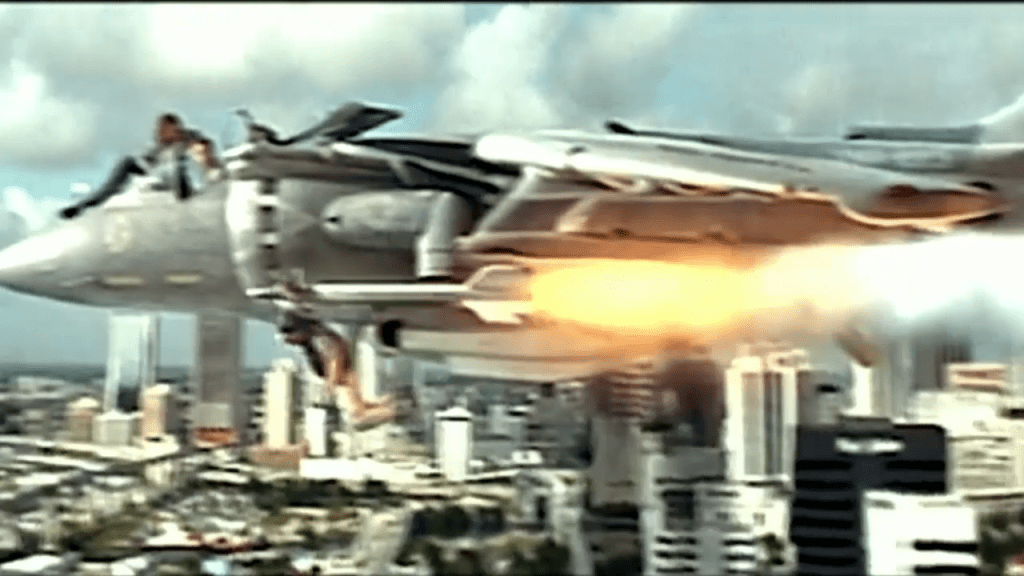
- “Padlocked. In hot with guns. Let’s get some.” The pilot calls ‘padlock’ to indicate the need to keep eyes on the target and the Harriers roll in for a gun run. Note that the Harriers are carrying AIM-9 Sidewinders, rocket pods, AGM-65 Mavericks, and their GAU-12/U 25mm Equalizer gun pods.

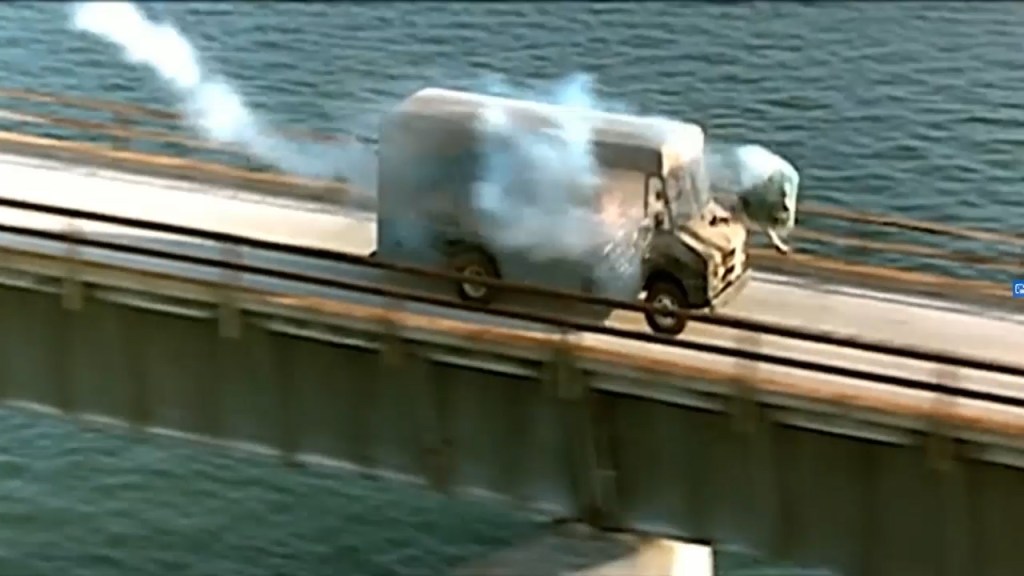
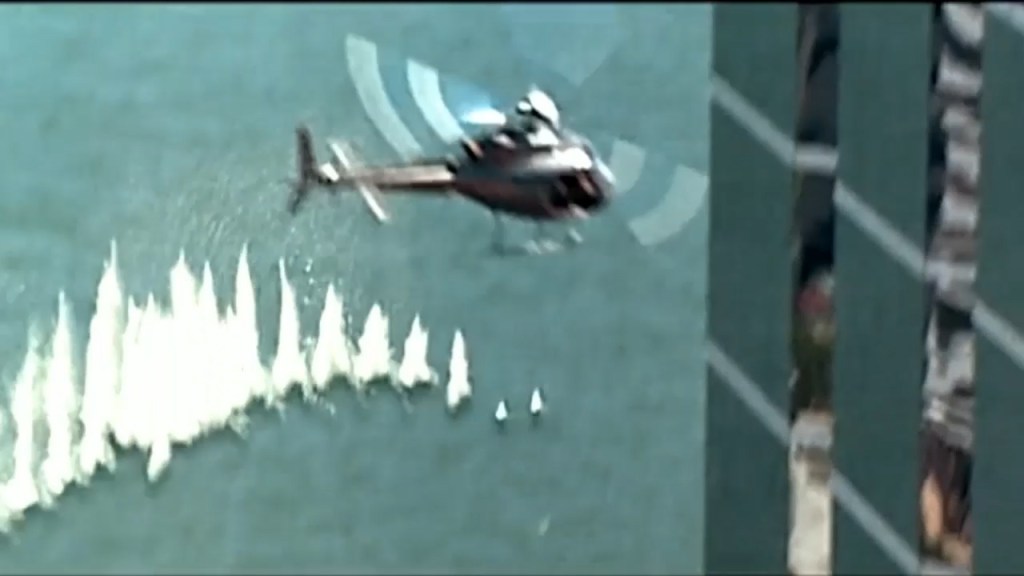
- A Harrier opens fire on a truck. You can see 25mm shells impacting the water. Of course, it’s a movie, and it’s really just explosive charges planted in the water. Also, the splashes don’t seem to coincide with where the jet (and gun) is pointed, given how close the aircraft is to the target. You’d think it would be in more of a dive, but it appears to be flying straight and level. For whatever reason, the gun run does minimal damage to the truck.
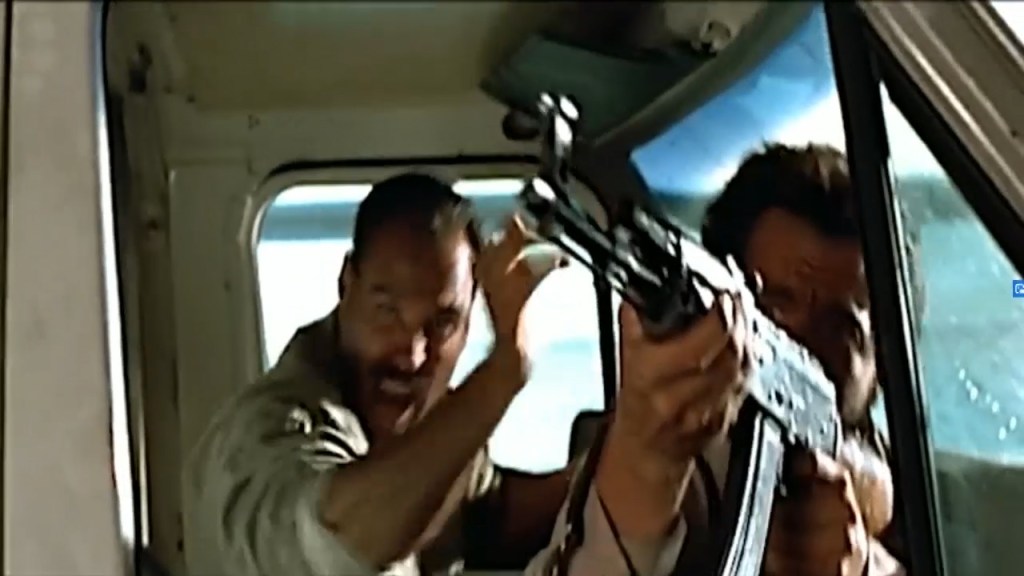
- A terrorist opens fire on the attacking Harrier with an AKM. What he’s hoping to accomplish is beyond me. But hey, wishful thinking. I guess it makes him feel better.
- A second gun run (on presumably the same target) shreds the box truck like it’s made out of paper. Indeed, that’s probably what would happen in real life. It’s also appropriate that the Harriers would be attacking such targets with their guns because the trucks aren’t armored, and there’s no need to waste more powerful ordnance on them. A thin-skinned vehicle, like a box truck, wouldn’t stand up to a 25mm Gatling gun at all. It’s hard to see, but it appears that the passenger is partially dangling out the window.


- A couple of terrorists in another truck actually came prepared. They try to get clever and ready an FIM-92 Stinger MANPAD to try and shoot down the attacking planes. The guy on the right is flipping up the launcher’s sight.
- What they don’t realize is that the exhaust end of the launcher is pointed into the truck and directly at one of their fellow jihadists. Firing a launcher in an enclosed space is not a healthy decision.
- The soon-to-be unfortunate recipient of the rocket blast turns around, realizes that things are about to get really toasty for him, and tries to warn his buddies. But their zeal to kill the attacking planes makes them deaf to his cries for mercy.
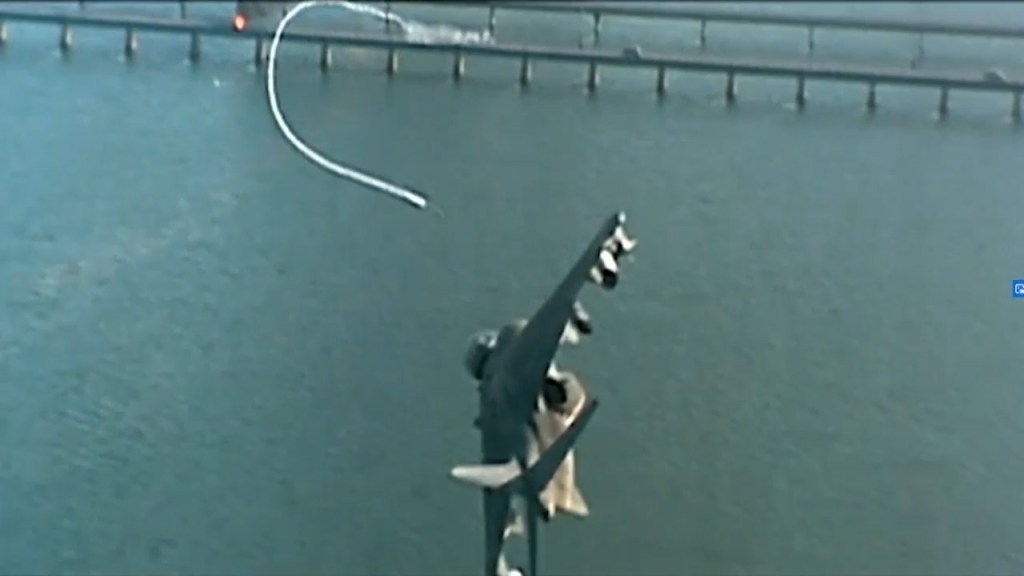
- The bad guys fire the Stinger. You can see the missile leaving the tube and the resulting backblast in the rear.
- Their buddy takes the backblast directly to the face and gets blown out of the windshield for his trouble. Newton’s Third Law at work.
- The Harrier pilot realizes that a missile has been fired at him and turns to evade. Interestingly, he doesn’t deploy any countermeasures, like flares, to decoy the missile. Perhaps the Harrier doesn’t have a particularly large IR signature from the front. (The Stinger is an IR-guided missile, so flares would be the appropriate countermeasure. If it were a radar-guided weapon, then the Harrier’s AN/ALR-67(V)2 RWR would’ve likely warned the pilot.)
- The Harrier pilot successfully jinks the missile and breaks off his attack. You can see the missile coming on-screen from the right.


- The driver of the truck isn’t terribly pleased that his passengers just scorched the entire interior of the vehicle (along with his shirt) when they fired that missile. He also tries to tell them that they just defenstrated their buddy.
- They both give him a rather (comically) bewildered look as if to say, “Huh? Whuut? I don’t get it.” Maybe they didn’t like him very much, so who cares if he got thrown out of the windshield and run over. In reality, they’d all probably be dead or severely injured if they fired that missile from inside that truck. While there are some rocket or missile launchers that can be fired from enclosed spaces, I don’t believe the FIM-92 Stinger (or any of its variants) is one of them.
Soon afterward, Harry orders the Marines to “khick ahzz” by taking out the bridge with their AGM-65 Mavericks.


- One of the pilots is understandably concerned and asks about the possibility of the missiles detonating the nukes.
- Harry reassures him that that won’t happen, and shrugs his shoulders at Gib, as if to say, “I dunno…they probably won’t detonate, right?” I’m no nuclear weapons expert, but from my understanding, nuclear bombs are engineered in such a way that they’ll only detonate when armed, and as they’re specifically designed to do. Shooting them or blowing them up will simply render them useless. So, the pilot has nothing to worry about, but it never hurts to ask.
- “Fire!” The CGI Mavericks fly off the rails. Although I believe the correct call for the release of an air-to-ground missile is “rifle.”
- The Harriers peel off as the missiles dip down towards the bridge.
- Interestingly, the Mavericks skim the surface of the water like they’re AGM-84 SLAMs (a land attack variant of the Harpoon anti-ship missile). I don’t know if the AGM-65 Maverick has that kind of flight profile. It’s generally used as an anti-tank weapon, but it can be used against a variety of different surface targets (basically whatever it’s guided towards).


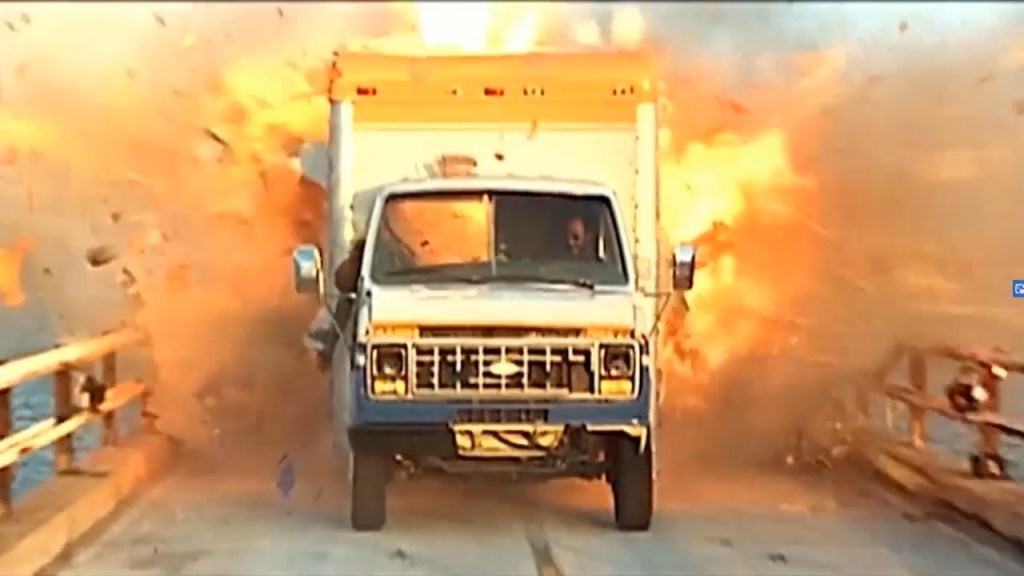
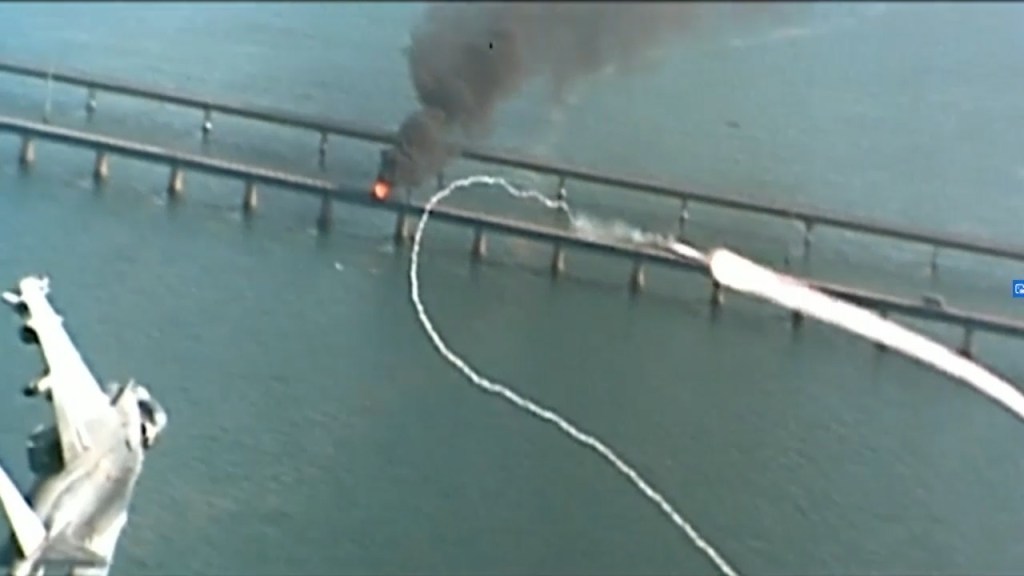
- The first missile hits.
- The second missile is about to hit.
- The third missile hits, and the fourth is about to hit just ahead of the truck. Note that the missiles seem to be targeted at the bridge supports.
- The resulting explosions send one of the terrorist trucks flying, which lands on its side.
- The bridge collapses, and the last terrorist truck (with the Stinger fellas in it) goes over the edge to explode in the ocean.
Harry still has to rescue his wife, Helen (Jamie Lee Curtis), who’s trapped inside a limo and heading towards the collapsed portion of the bridge. Standing on the skid of the helicopter, Harry hovers over the limo and tries to get his wife’s attention.
Harry tries to warn his wife that something is amiss with the road up ahead. However, she can’t understand him because of his thick Austrian accent…or it could be the noise from the helicopter. She eventually figures out what he’s saying.
Anyway, Harry rescues Helen in the nick of time, and it seems like all is well. Back to the Harriers.

27 & 28: Some cool shots of the Harriers doing vertical landings after the battle. Is it just me, or do the two planes have different-sized rocket pods? The aircraft in the image on the left looks to have smaller rocket pods than the one on the right. Compare the size of their pods in relation to the Sidewinder missiles.
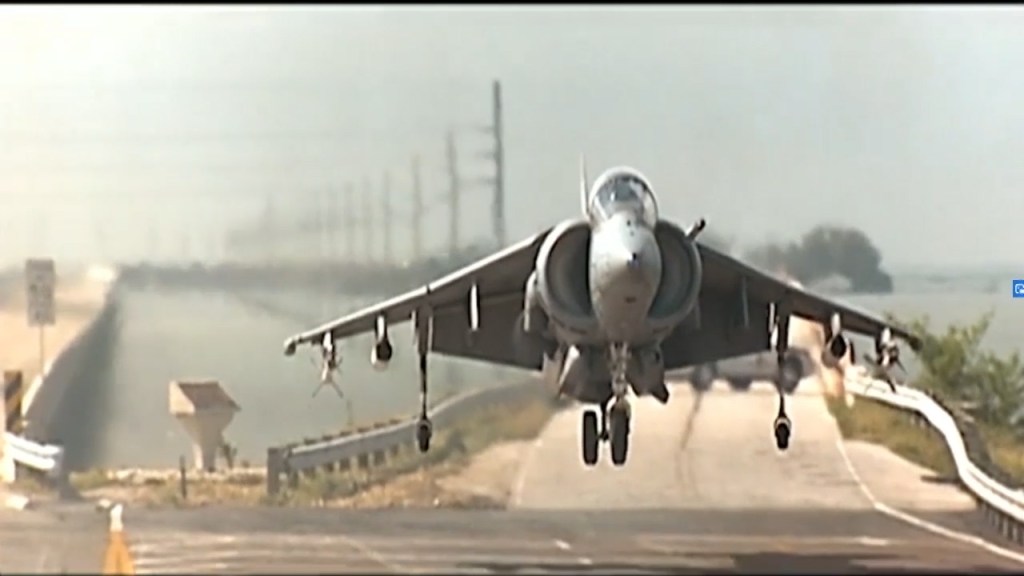
However, the fun ain’t over yet. The climax of the film involves Harry commandeering one of the Harriers and going off to rescue his kidnapped daughter, Dana (Eliza Dushku). Harry’s partner, Gib, tries to remind him that he hasn’t flown a Harrier in 10 years, but Harry replies that “If I break it, they can take it out of my pay.” Harry starts up the engine and proceeds to do a vertical takeoff…poorly.


- The nozzles rotate down to do a vertical takeoff.
- Harry struggles to get the jet airborne. In reality, the jet blast from the nozzles is powerful and would probably rip up the pavement underneath the plane. It might also damage those cars, and I doubt those people would want to stand so close by. A U.S. Navy buddy of mine who served aboard the USS Tarawa (LHA-1) said that Harriers are the loudest freaking things on Earth. Their powerful Pegasus engine creates an ear-piercing whine.
- Harry’s takeoff is so rusty that he destroys the roof of a sheriff’s car with the nose gear in the process.
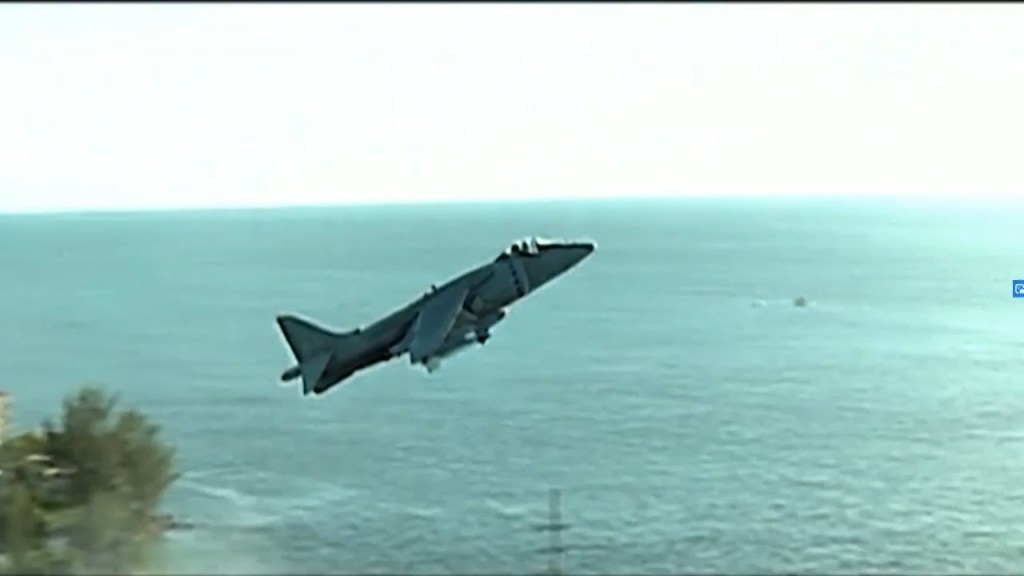
- Eventually, Harry gets the jet into forward flight.
Harry pilots the Harrier to Miami at the end of the film to finally deal with the rest of the terrorists and rescue his daughter. What’s most amusing about this scene is that the jet is perpetually hovering and is treated more like a helicopter. In reality, the Harrier only uses vertical flight for take-offs and landings. Even at that, it’s very fuel inefficient, and conventional or short take-offs/landings are preferred whenever possible. The plane also has a limited amount of water for injection into the engine to provide a greater amount of “wet thrust.” But, whatever. It’s a movie.
In case you’re wondering, no, Arnold Schwarzenegger didn’t fly a real Harrier for the film. The jet in the climax of the film that Harry pilots was a full-size fiberglass mock-up, either hung from a crane or mounted on a tilting gimbal mount, which was removed in post-production.


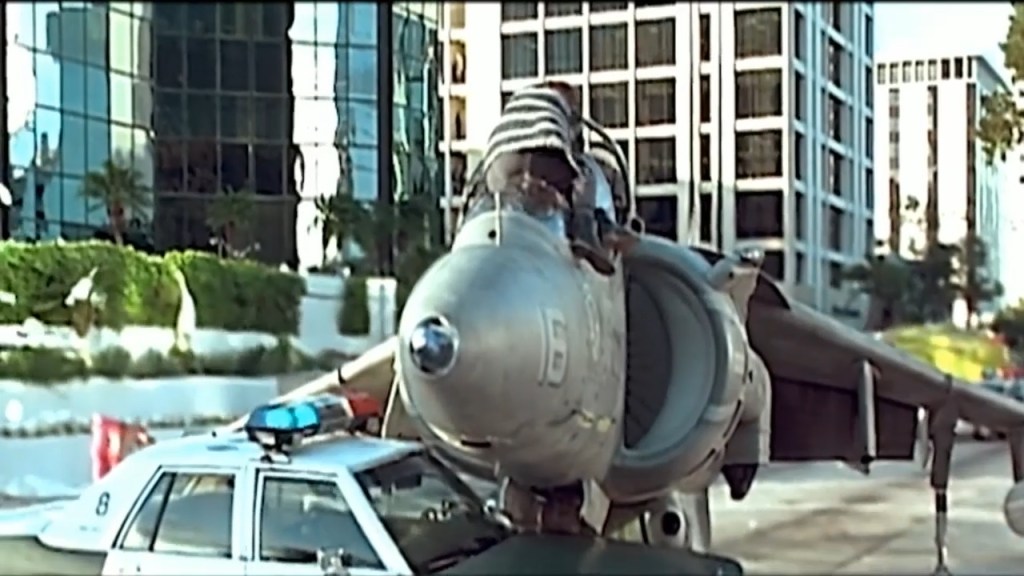
- Hearing the sounds of a jet outside, the bad guys start scanning with binoculars only to see Harry rise up in the Harrier right in front of them.
- The bad guys realize what they’re looking at and struggle to ready their weapons.
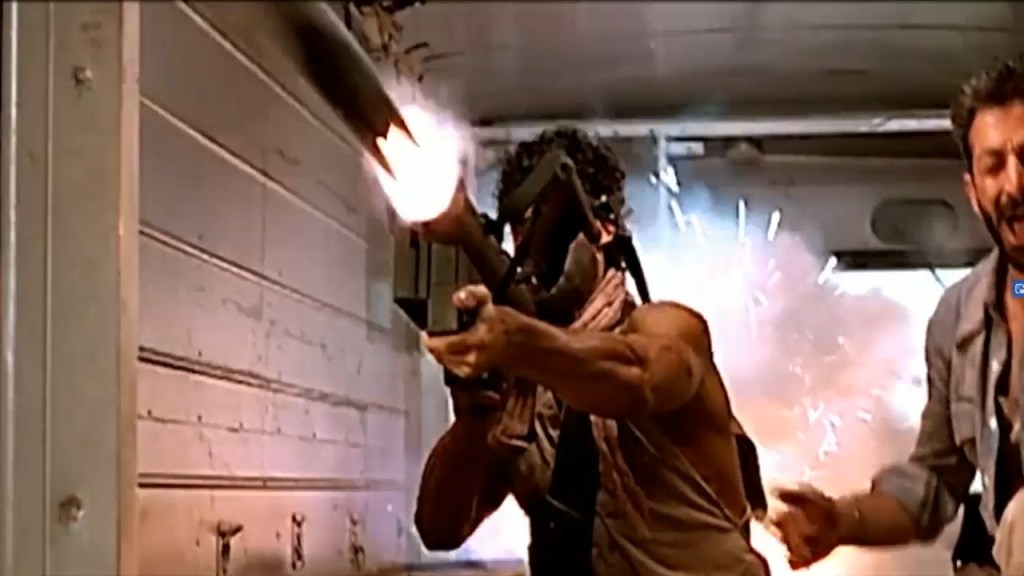
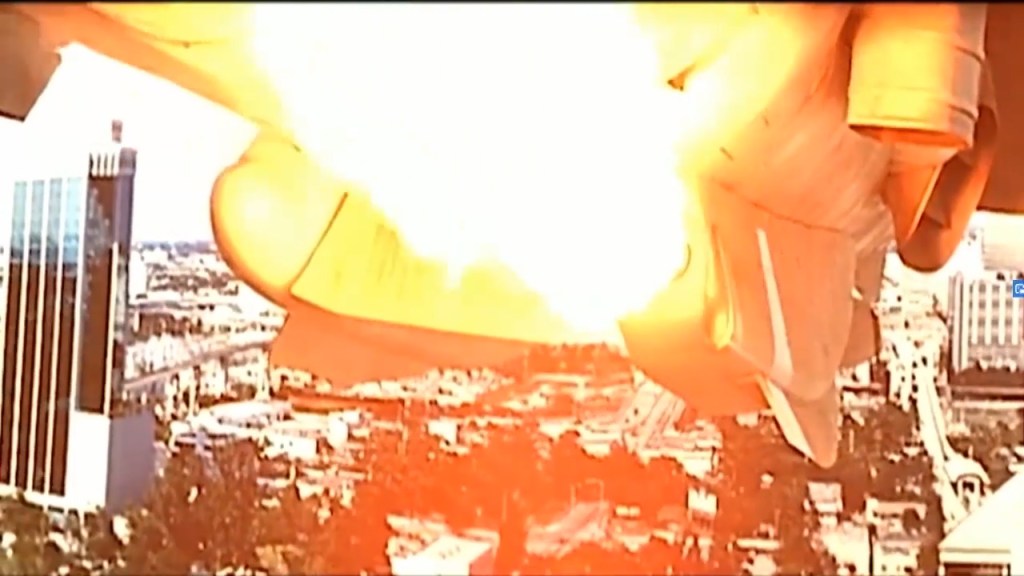
- The GAU-12/U is fired. In reality, it’s a torch igniting acetylene gas which simulates a large gun firing.
- Harry ventilates an entire office floor with the 25mm gun in one enormous burst. The jet appears to be hovering pretty close to the building, and one wonders how the turbine didn’t suck in tons of Foreign Object Debris (FOD) in the form of shattered glass. Also, the 25mm rounds would not only go through that entire building but also anything for some distance on the other side. Thankfully, Harry has “hero insurance” so collateral damage is covered.
Also, since the hero is piloting the jet, this allows Harry to put an insane amount of ammo through the GAU-12/U gun. In reality, the Harrier carries some 300x 25mm rounds for the gun, and it has a rate-of-fire of around 2,000-4,000 RPM. While the pilots already expended a significant amount of gun ammo when attacking the terrorist trucks on the bridge, Harry apparently has the infinite ammo cheat unlocked. He holds the trigger down for long bursts.


- “Juamph! Dhaddy will catch youh!” Harry brings the plane up under Dana who is hanging on for dear life from a crane on the roof of the building. It’s unlikely she’d be able to hear him screaming over the roar of the engine. But hey, it’s a movie.
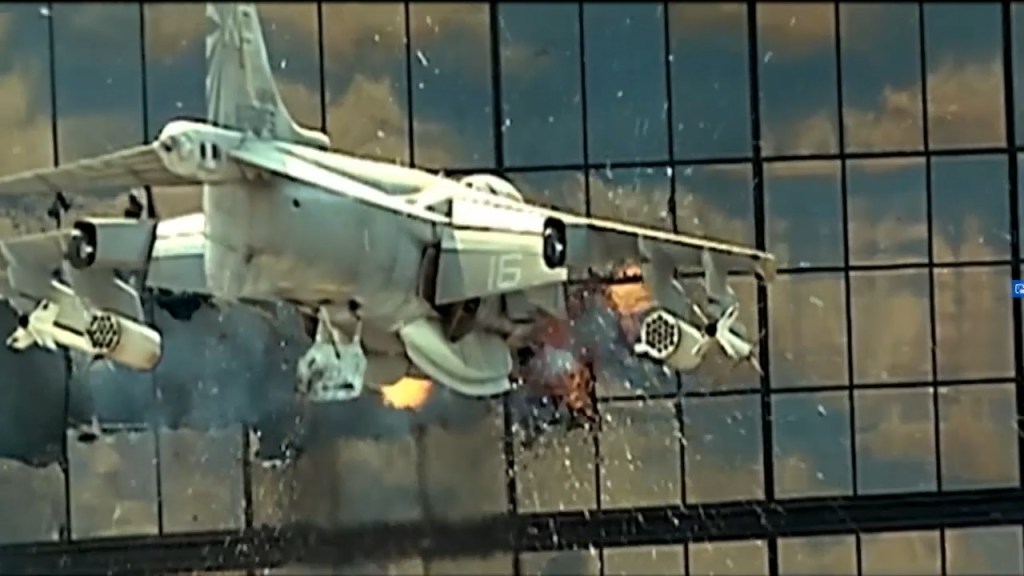
- The big bad terrorist, Aziz (Art Malik), fires on the jet with his AKMS, shattering part of the canopy.
- The Harrier yaws causing the vertical stabilizer to strike the crane. Aziz drops his AKMS and the sling snags on the tail.
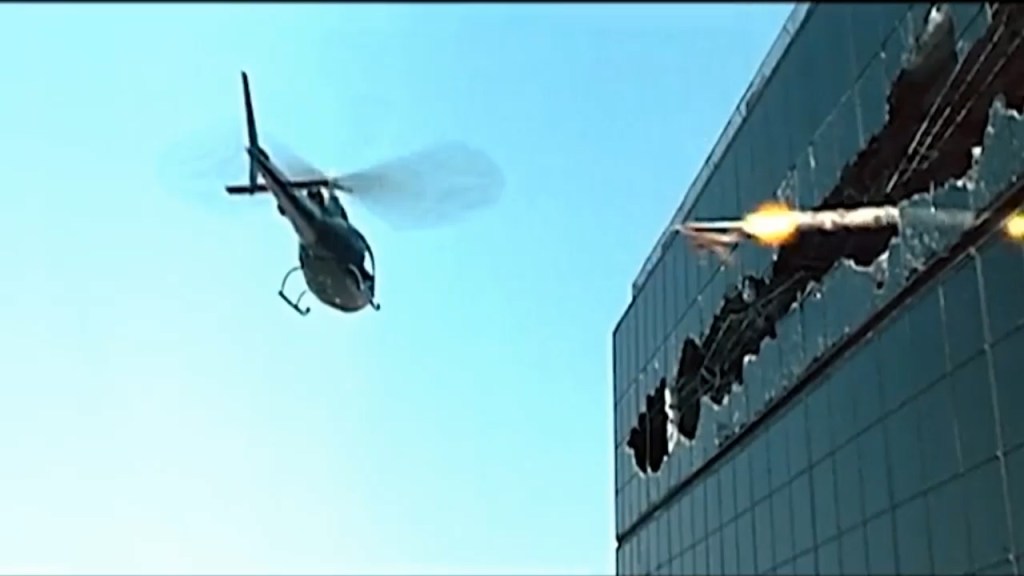
- Meanwhile, other terrorists have taken flight in a helicopter. The door gunner shoots at Harry with an M60 machine gun.
- Harry maneuvers the jet around to fire on the attacking helicopter.
- Harry fires a massively long burst at the helicopter, failing to score any hits, and damages that building it’s about to fly behind in the process.
- Dana falls from the crane and lands on the nose of the Harrier. Harry tries to help her as she clings to the shattered canopy. In reality, she’d probably be sucked into the turbine.

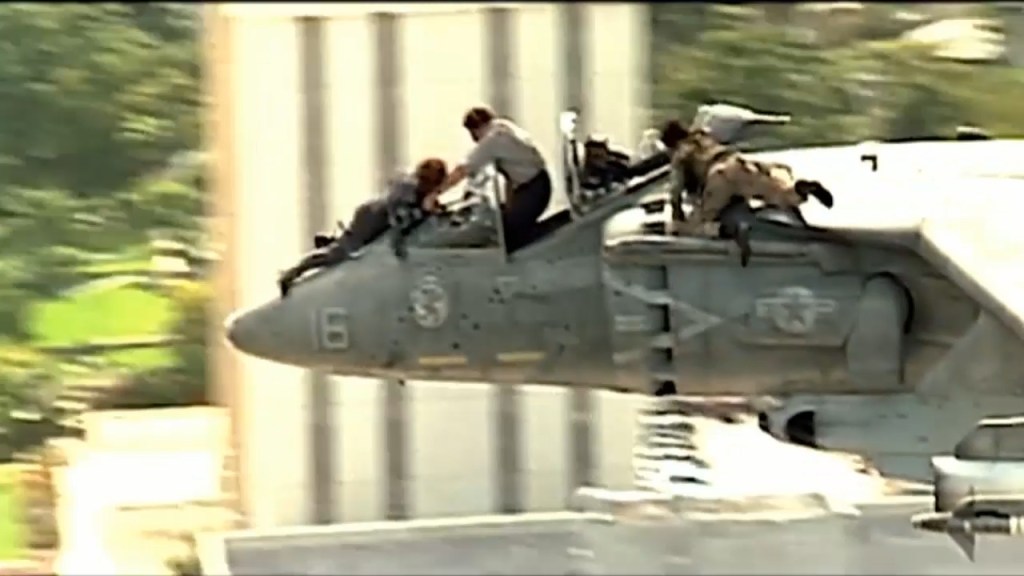

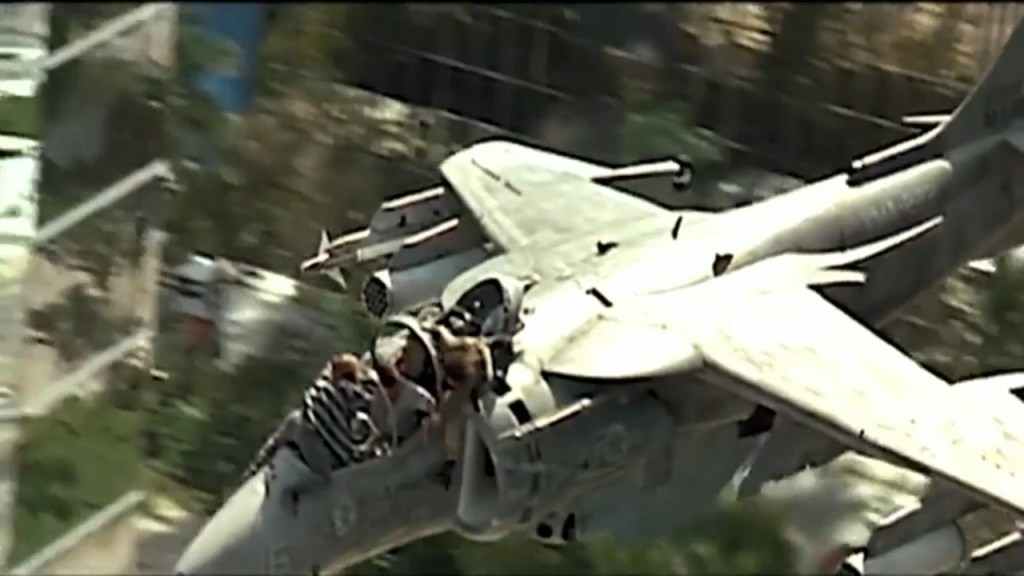

- Aziz jumps from the crane and lands on the Harrier. You can see the AKMS he previously dropped hanging off the tail by its sling (where it says “VMA-223”).
- As Harry tries to keep Dana from falling, Aziz crawls forward toward the cockpit.
- Aziz attacks Harry with a deadly rubber stunt knife.
- As Harry and Aziz grapple, the Harrier begins drifting backward and out of control. Given his position next to the cockpit, it’s a wonder Aziz isn’t sucked into the air intake, as well. But, whatever.
- A janitor in a nearby office building is so busy listening to his tunes that he fails to notice the incredibly noisy jet careening out of control towards his building.


- The Harrier drifts backward and smashes into the building tail first. How the aircraft (or at least its tail) is still intact and flyable after that collision is beyond me. Whatever, it’s a movie.
- The force of the collision throws Aziz backward and he lands with his balls astride the vertical stabilizer. The only time we “feel” any sympathy for the villain.
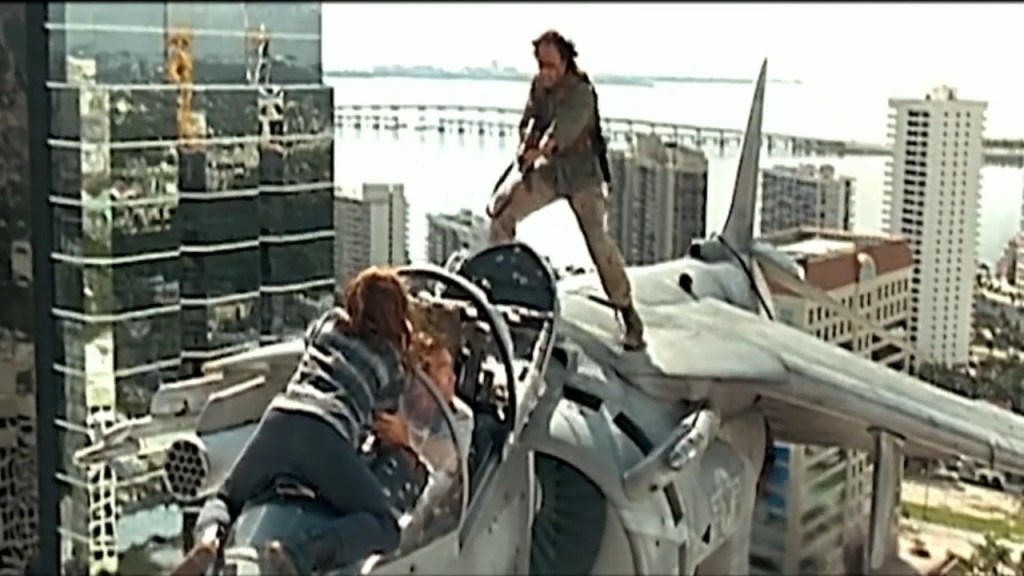
- “Take this plane down, now! I’ll kill her!” Grabbing his AKMS, which is still hanging off the tail, Aziz runs forward and threatens to shoot Dana if Harry doesn’t land the plane.
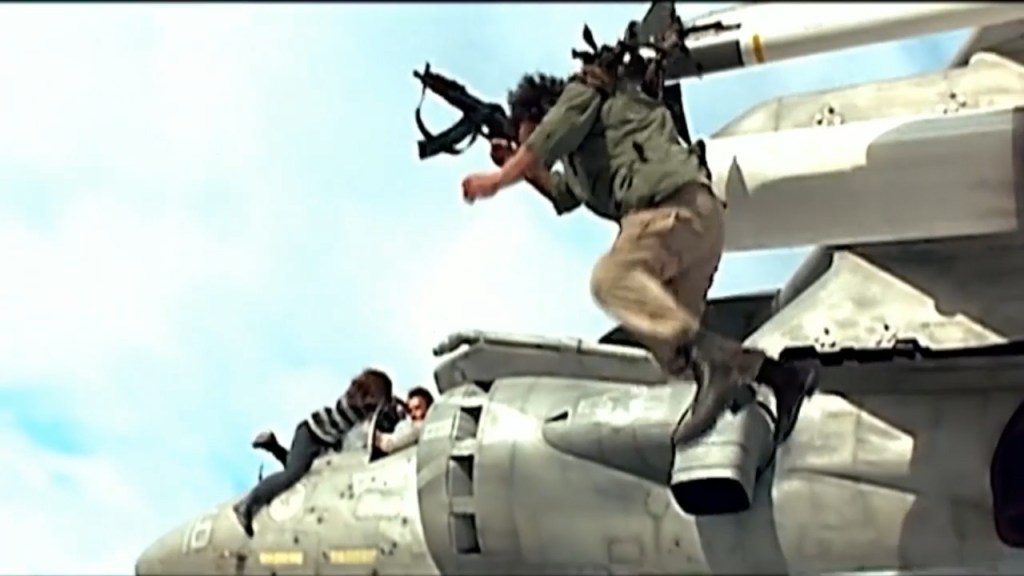
- Dana holds on for dear life as Harry rolls the plane to the left causing Aziz to lose his balance and go sliding off the wing.
- Aziz’s web gear catches on the nose of a Sidewinder missile, leaving him hanging.
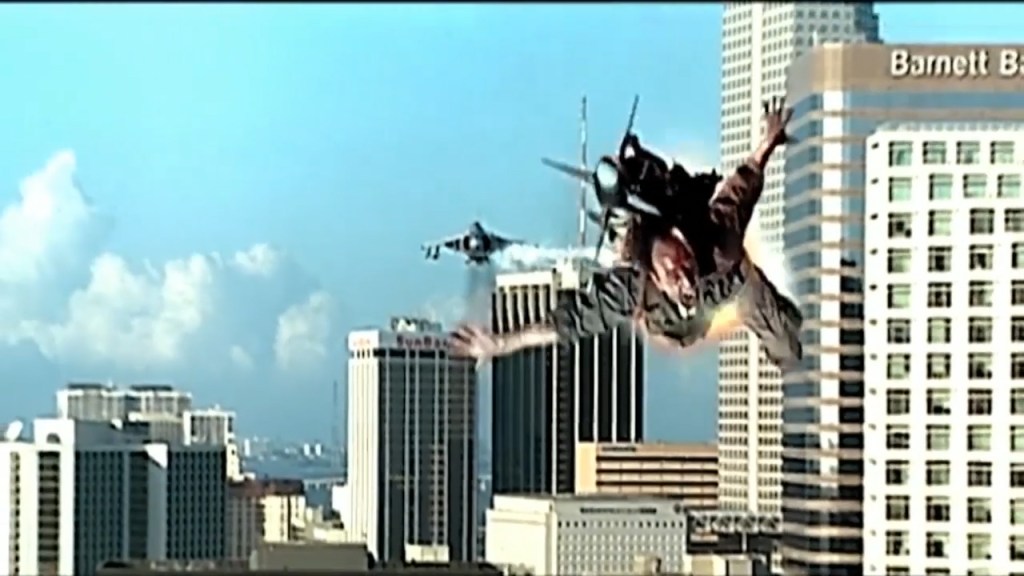
- “Youahr Fiearhd.” Seeing the previous enemy helicopter off in the distance, Harry flicks on the Master Arm and fires the missile with Aziz on it. I doubt the missile would fly straight with a man hanging off the nose, and even if it could, Aziz probably wouldn’t survive the acceleration. But hey, it’s a movie.
- Aziz learns what it feels like to be a bird…flying really fast.
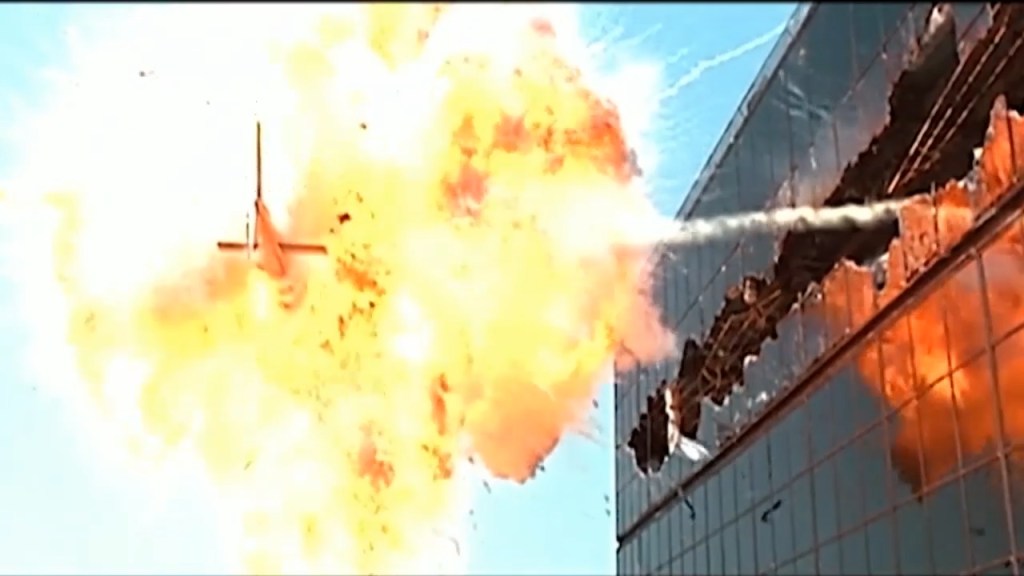
- The missile and Aziz fly through the previously destroyed building at the enemy helicopter.
- Direct hit. All the bad guys are dead.
- Harry lands the Harrier in the street and damages one more police car in the process. Dana is still clinging to the front of the canopy in terror. The good guys win in the end, and the day is saved! Hurray!
War Game Quick Battle
Now, let’s examine our C:MO recreation of the bridge attack scene. For various reasons listed below, I’m not attempting to recreate the scenes with the Harriers shot-for-shot. Also, I’m not going to attempt to recreate the final battle around the skyscraper where the plane hovers for a ridiculous amount of time.
Since C:MO is an air/naval operations sim, it’s not a tactical flight sim. So, it doesn’t depict many tactics with a fine amount of detail. In fact, the further in detail you go, tactically, the less relevant and useful C:MO becomes. Other limitations include:
- The implementation of land warfare and ground vehicle behavior is fairly limited. Ground vehicles are basically limited to what speed they can move over land depending on the terrain (urban, forest, swamp, etc.). The terrain type also affects visibility.
- Roads are shown on the map layer, but they don’t physically exist as a terrain feature, and vehicles aren’t programmed to follow them. In the case of this war game, the Seven Mile Bridge in the Florida Keys is visible on the satellite map (and on the roads overlay), but since vehicles can’t drive on bridges (even if you put one in the scenario as a unit) the game just models open water between the islands.
- For whatever reason, the Harriers can only carry AGM-65E Laser Mavericks. These require a targeting pod or a buddy lase. Therefore, I had to use AV-8B Harrier II+ versions (circa 2001) since these mounted a Litening TGP. They also have the APG-65 radar, but I kept it turned off.
- I’ve substituted in an Avenger SAM section (with a single Stinger missile) to simulate the terrorists having an FIM-92 Stinger launcher.
Video
Comparison of Main Weapons
| AGM-65E Maverick Laser (1986) | FIM-92A Stinger (1982) |
|---|---|
| Surface Max: 14.8 km. Land Max: 14.8 km. | Air Max: 5.6 km. |
| Properties: Terminal Illumination, Supports Buddy Illumination Laser Spot Tracker – Laser Spot Tracker (LST) Max Range: 27.8 km | Properties: Anti-Air All-Aspect IR Seeker – (AIM-92, FIM-92) Infrared Weapon Seeker, Dual Spectral IR Max Range: 18.5 km |
| 25mm GAU-12/U [Gun] | |
| Air Max: 1.5 km. Surface Max: 2.8 km. Land Max: 2.8 km. |
Statistics
| USMC [PLAYER] | Crimson Jihad [A.I.] |
|---|---|
| Losses: None | Losses: 1x Bridge (2 lane, 60 tons) 2x Avenger SAM 4x Vehicle (Truck, Unarmed) |
| Expenditures: 6x 25mm GAU-12/U Burst [60 rounds] 4x AGM-65E Maverick, Laser 1x Generic Flare Salvo [3x Cartridges, Single Spectral] | Expenditures: 1x FIM-92A Stinger |
Notes for the message log
*Times reported in ZULU time. The entire log isn’t included, just some highlights. USMC (Player) events are in blue and Crimson Jihad (OPFOR) events are in red.
- 12:33:12 PM – [Crimson Jihad] Contact: Attack #155 was observed attacking a friendly unit and is now considered as hostile! (Reason: Weapon launch was spotted visually)
- 12:33:13 PM – [Crimson Jihad] Contact: Attack #155 has been classified as: AV-8B Harrier II+ [Night Attack] – Determined as: Hostile (Classification by: SAM Sec (Avenger) [Sensor: AN/VLR-1 ISU] at 3.4 nm)
- 12:33:14 PM – [USMC] Contact: MOBILE #2 has been classified as: SAM Sec (Avenger) – Determined as: Hostile (Classification by: AN/AAQ-28(V)1 Litening II Pod [FLIR + LRMTS, 50k ft] [Sensor: AN/AAQ-28 [FLIR]] at 3.6 nm)
- 12:33:14 PM – [USMC] Contact: MOBILE #3 has been classified as: Vehicles (Truck x 4) – Determined as: Hostile (Classification by: AN/AAQ-28(V)1 Litening II Pod [FLIR + LRMTS, 50k ft] [Sensor: AN/AAQ-28 [FLIR]] at 3.5 nm)
- 12:33:24 PM – [USMC] New contact! Designated SAM #4 – Detected by AV-8B Harrier II+ [Night Attack] [Sensors: Mk1 Eyeball] at 310deg – Estimated 3nm – No Contrail Detected.
- 12:33:34 PM – Decoy (Generic Flare Salvo [3x Cartridges, Single Spectral]; Tech: Single-spectral IR) from AV-8B Harrier II+ [Night Attack] is attempting to seduce sensor: IR Seeker (Tech: Dual-spectral IR)(Guiding weapon: FIM-92A Stinger #182). Final probability: 10%. Result: 21 – FAILURE
- 12:33:34 PM – Weapon: FIM-92A Stinger #182 is attacking AV-8B Harrier II+ [Night Attack] with a base PH of 50%. PH adjusted for distance: 30%. PH adjusted for actual target speed (503 kts): 15%. AV-8B Harrier II+ [Night Attack] has nominal agility: 4, adjusted for altitude: 4. Agility adjusted for proficiency (Veteran): 4. Aircraft has a weight fraction of 0.34 – Agility adjusted to 3.19. High-deflection impact (no effect on agility). Final agility modifier: -32%. Sea-skimmer modifier: -30%. Final PH: 1%. Result: 33 – MISS
- 12:33:56 PM – Weapon: AGM-65E Maverick Laser #180 has impacted Bridge (Two-lane 60 Tons). 100% Penetration Achieved.
- 12:33:57 PM – [USMC] AV-8B Harrier II+ [Night Attack] reports BDA status change on contact: Bridge (Two-lane 60 Tons) – Medium damage – Minor Fire
- 12:33:57 PM – Weapon: AGM-65E Maverick Laser #181 has impacted Bridge (Two-lane 60 Tons). 100% Penetration Achieved.
- 12:34:10 PM – Weapon: AGM-65E Maverick Laser #185 has impacted Bridge (Two-lane 60 Tons). 100% Penetration Achieved.
- 12:34:10 PM – [Crimson Jihad] Bridge (Two-lane 60 Tons) has been destroyed!
- 12:34:11 PM – Weapon: AGM-65E Maverick Laser #186 has detonated, 3.166462m from intended target point.
- 12:36:28 PM – Weapon: 25mm GAU-12/U Burst [60 rnds] has impacted Avenger SAM (of SAM Sec (Avenger)). 95% Penetration Achieved.
- 12:36:28 PM – [Crimson Jihad] Avenger SAM has been destroyed!
- 12:38:54 PM – Weapon: 25mm GAU-12/U Burst [60 rnds] has impacted Vehicle (Truck, Unarmed) (of Vehicles (Truck x 4)). 95% Penetration Achieved.
- 12:38:54 PM – [Crimson Jihad] Vehicle (Truck, Unarmed) has been destroyed!
- 12:38:57 PM – Weapon: 25mm GAU-12/U Burst [60 rnds] has impacted Avenger SAM (of SAM Sec (Avenger)). 90% Penetration Achieved.
- 12:38:57 PM – [Crimson Jihad] Avenger SAM has been destroyed!
- 12:41:47 PM – Weapon: 25mm GAU-12/U Burst [60 rnds] has impacted Vehicle (Truck, Unarmed) (of Vehicles (Truck x 4)). 100% Penetration Achieved.
- 12:41:47 PM – [Crimson Jihad] Vehicle (Truck, Unarmed) has been destroyed!
- 12:47:08 PM – Weapon: 25mm GAU-12/U Burst [60 rnds] has impacted Vehicle (Truck, Unarmed) (of Vehicles (Truck x 4)). 97% Penetration Achieved.
- 12:47:08 PM – [Crimson Jihad] Vehicle (Truck, Unarmed) has been destroyed!
- 12:48:35 PM – Weapon: 25mm GAU-12/U Burst [60 rnds] has impacted Vehicle (Truck, Unarmed) (of Vehicles (Truck x 4)). 100% Penetration Achieved.
- 12:48:35 PM – [Crimson Jihad] Vehicle (Truck, Unarmed) has been destroyed!
Evaluation
There’s not much to say about this battle since it was pretty much a curb stomp. What’s interesting is that the Harrier’s flare decoys had such a poor final probability (10%) of decoying the Stinger missile (which they failed to do anyway). Additionally, the Stinger had a base Probability of Hit (PH) of 50% or a one-in-two chance. However, adjusted for modifiers, the final PH was 1%.
One thing I noticed when playing this scenario was that the Harriers didn’t seem to extend much to gain distance so they could make a decent gun run on the trucks. I occasionally had to plot or move waypoints so they could get a good and straight gun run on the targets. Whether or not this is a limitation of the game’s engine is unknown.
The greatest learning experience in this scenario came not from playing it, but rather from building and testing it. Of course, these aren’t really problems with the game engine, but rather a process of me learning how to use the game. When building this scenario, I made sure to only give the terrorists a single Stinger missile, since that’s all they managed to fire at the Harriers in the film. I also decided to make the Harriers attack the bridge first and then visually locate and attack the trucks afterward because static structures have much less ambiguity in their location and present easy targets. One could also argue that the threat posed by the terrorists getting multiple nuclear weapons onto the mainland would justify destroying the bridge before taking out the terrorist ground vehicles, despite the fact that you’d be severing a vehicular artery to the islands. By destroying the bridge, you would thereby block the path of the terrorists and halt their progress in case the Harriers failed to locate and destroy all the trucks (even though the ground vehicles were stationary in this scenario due to game engine limitations).
In fact, destroying the bridge may have been part of Harry’s rationale in the film. As was seen, the terrorists had three box trucks and the Harriers made two gun runs on (presumably) the same truck before they succeeded in destroying it. One Harrier had to evade a Stinger when it was, presumably, lining up for a gun run on another truck and had to break off its attack. At that point, Harry ordered the bridge to be taken out. The second truck was destroyed as the Mavericks detonated against the bridge. The last truck (with the Stinger launcher guys) came to a teetering halt on the edge of the collapsed bridge section before a bird landed on the hood and it fell into the ocean and exploded.
As I began testing the scenario, I also learned about the importance of properly setting some of the Weapons Release Authorizations (WRA) and the Return-to-Base (RTB) mission parameters. Obviously, I didn’t want the Harriers using their Mavericks on the trucks, since they fired them on the bridge in the movie. It also would’ve been pointless and overkill to waste a missile on a thin-skinned vehicle. Therefore, I had to specify that they weren’t to use them against soft-skinned mobile vehicles and that they could do air-to-ground gun runs. Further testing saw additional scenario problems. Despite giving them orders to attack the trucks, the Harriers consistently ignored them and returned to base at NAS Key West upon destroying the bridge. I briefly struggled with figuring out why this was happening. As it turns out, they were set to RTB after expending their main ordnance (the Mavericks) and wouldn’t engage any targets of opportunity. Once I changed these settings, I got the mission to work as I wanted it to.
All in all, it’s important to remember that we’re attempting to simulate a piece of fiction in a war game simulator. We all know that Hollywood creates its own reality, and laws of physics, out of convenience and for our entertainment. So, we shouldn’t expect the simulator to conform to the distorted Hollywood laws of physics and vice versa. In other words, don’t take it too seriously. These Quick Battles involving movie reenactments are just meant to be fun.
Alternatives
- The Stinger could’ve shot down one of the Harriers.
- The Harriers could’ve failed to destroy the bridge with their Mavericks. The missiles could’ve malfunctioned or missed.
- The Harriers could’ve missed the trucks and expended all of their ammo on their gun runs.
- Skynet could’ve become self-aware and launched nuclear missiles on humankind (Oh wait, wrong movie.)
References
IMDb.com. (n.d.). True Lies (1994) Trivia. IMDb. https://www.imdb.com/title/tt0111503/trivia?ref_=tt_trv_trv.

Love that movie!
LikeLike
Solid stuff. Of note, the Harrier cannot use its cannon while in the hover- the bleed air from the engine either goes to the vents for hover stability or it goes to the cannon. As an ordnanceman in the Marine Corps that worked on Harriers, this always bothered us.
LikeLike